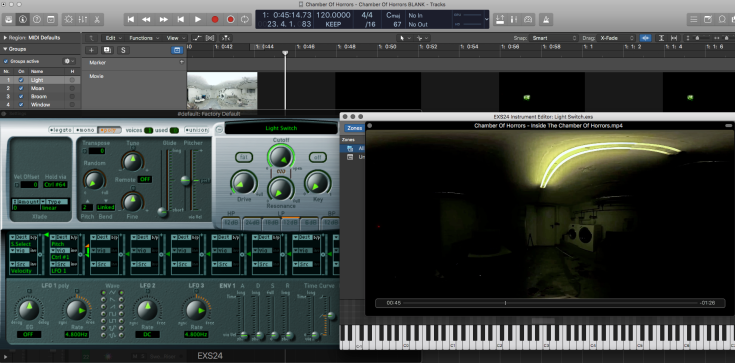
The assignment brief was to select a 360° VR video to create, place, mix, master & attach sound to. I recorded, created & sourced the audio assets then using FB360 spatialisation software in Reaper DAW I placed the audio within the space attempting to immerse the viewer in the scene.
Using your smartphone, laptop, tablet, PC or even better a VR headset, you can experience the 360° video. If using a VR headset be sure to click the YouTubeVR cardboard button.
YouTube VR Cardboard button
Press play in the YouTube video below & either use your mouse cursor, finger, trackpad, smartphone or headset to look around inside the film. You should hear sounds around you, investigate the scene to discover where the sounds come from.
Depending on your device type your experience will vary, I would suggest using headphones.
Immersive audio has a fixed position/placement in the film so when you move your head or viewpoint this will give you a different perspective, the audio will come from & remain at the intended source wherever or whatever that may be in the video, even if the source moves when you don’t.
Please note this is for educational purposes only, I did not create the video only the audio within.
Now I can play the sound on my midi keyboard whenever it occurs in the film, this will record the midi information into a track for me to bounce to the video eventually.
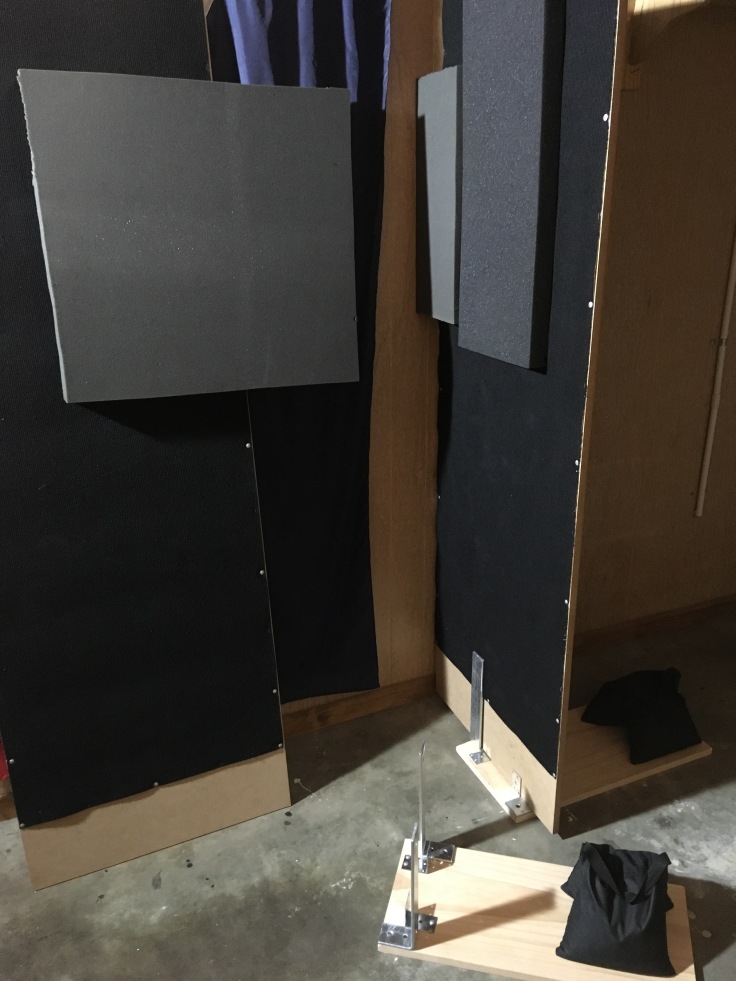
Here I have mounted ply walls to use for isolating a recording area. I figured I have a couple of decent microphones, so I should give my recordings the best chance to sound good.
So my plan was to make something inexpensive, portable, adaptable & does the job.
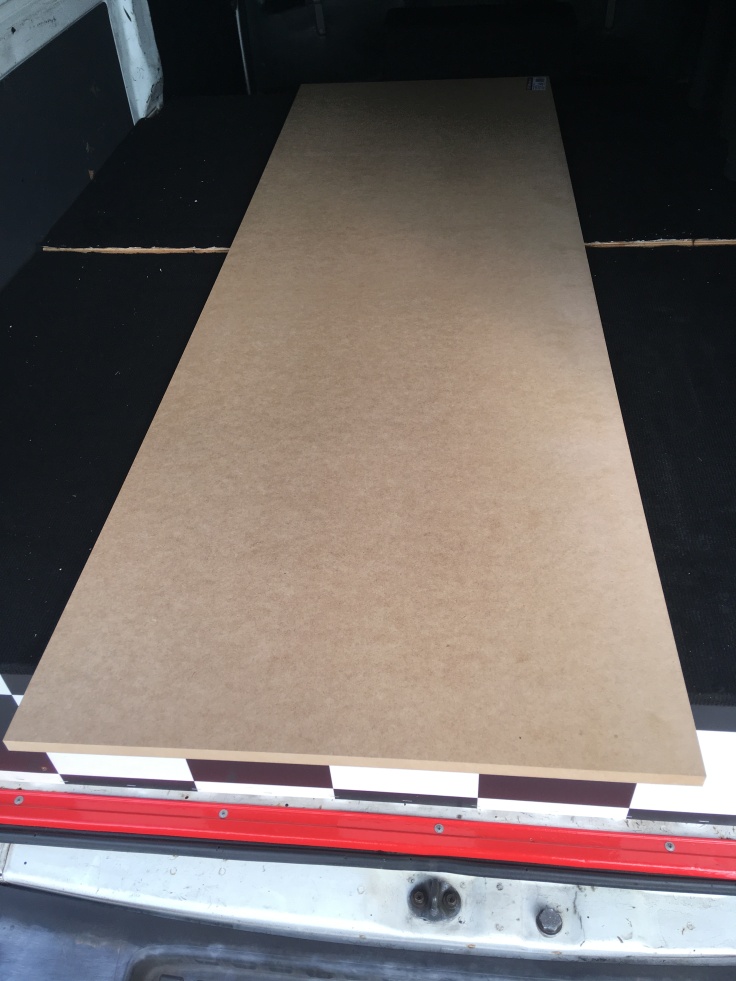
I decided to invest in this plywood X2.
Its fairly light, tall, durable, thick enough for a sound wall & can be treated in the future.
I have some leftover thin carpet I will fasten to the board, preventing any reflective surfaces so I can control the recording environment to suit my needs without too much hassle.
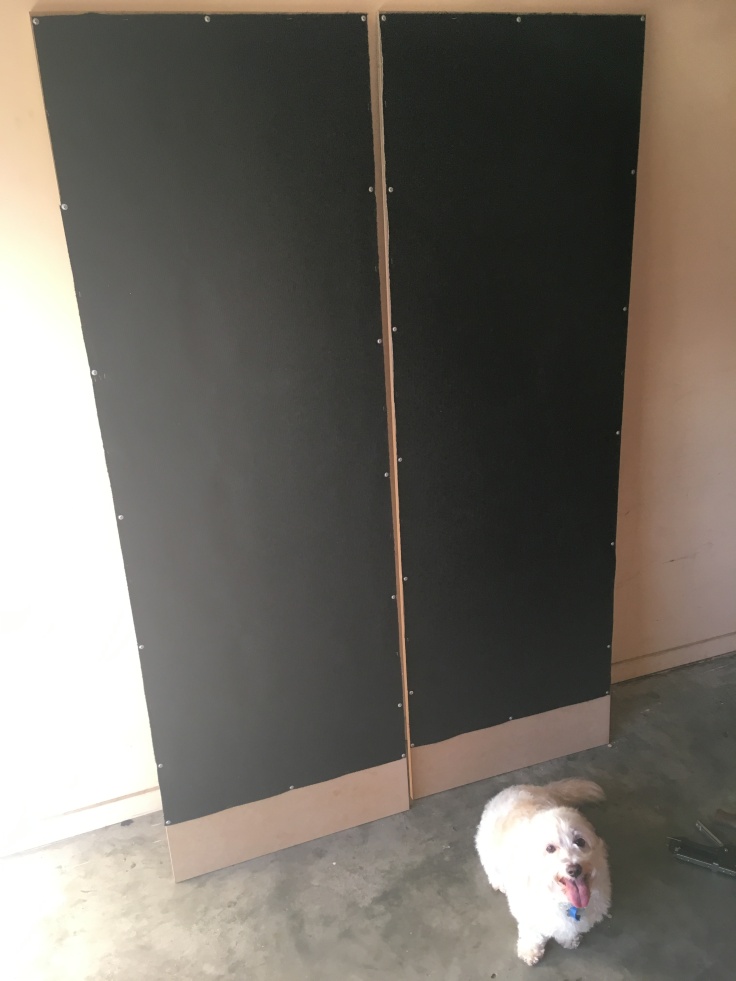
Leaving some space at the bottom I set to designing the stands.
Overthinking this could make it worse as mentioned I want a product that is efficient, durable etc.
I decided on separate bases I could position where I wanted, instead of a connected fold down option I considered (like a kickstand)
A couple of 90º brackets LRG & SML turned out brilliant! It allows me to slot the board in tight with no restrictions on angles etc.
I also decided on some length to allow for sandbags (weight) to counter the height of the board.
Happy with the result, just a bit of sanding & dressing up they will be good to G.O.
These isolation walls should allow me to capture HQ audio recordings in a fairly controlled environment, squaring them up to a corner with a mattress on another side or a hanging curtain will create a fairly dead space to record… now… where is my lead…
In my 15+ years as a Dj I have only really recorded some of my live sets, using my Zoom H6 handy recorder I recently purchased, now I can easily plug-in my left & right mix outs from my portable speakers. This is a snippet from a mix recorded July 8th 2017.
This video starts at the stage where you have selected (cut, edited, bounced etc) the audio you want to use in a sampler instrument which will allow you to play the sample pitched across a MIDI keyboard .
Now you have topped & tailed your audio samples, you will now drop a sample into the Sampler Instrument & manipulate the settings so you can play your edited audio like an instrument.
Celebrating over 33 years in existence as an industry standard protocol, MIDI (Musical Instrument Digital Interface) since its commercial birth in 1983 has revolutionised music & entertainment by ways of creating, controlling, capturing & sharing data then communicating it to any nominated device, software or computer.
I want to thank MIDI for enriching my life by making a track from MIDI’s that I possess.
YAMAHA RS-7000, BOSS DR Groove (DR-202) , 2 MIDI Keyboards (Axiom 25 & Acorn masterkey 61) & the DAW I use for production Logic X.
This slideshow requires JavaScript.
Please take this track, its MIDI information, audio samples & do what you want with it. (Download link at bottom)
For the love of music & audio creation you too should give your respect to the communication language that is MIDI & create what you like. Also let me know what you do with it please, I would love to hear it.
So…I love my acoustic guitars & I have studied & experimented with some of the many techniques to record them, in this blog I share one way I get good results with 2 Inputs – Mic & D.I.
As you could imagine there are many variables on these techniques & practices, given environment, microphones, inputs, ability & style of play, your sound captured will vary every time you set up & press REC, from the least to the most obvious of ways. Even if you do a solid 8 hr session one day then leave it overnight to record the next, your strings, environment & even your ability (tired, arm sore, still a horrible player etc.) will be effected.
But hey thats not a bad thing! We are always wanting originality in all work we do right? So capturing your recording in the moment, given all variables will give you that unique sound desired…or a ‘take’ that you can use for a scratch recording.
With the equipment I own I have found a way to achieve (to my ears) good results when recording acoustic guitar for the way I play, which is very basic, non technical & I’ll be honest amateur at best.
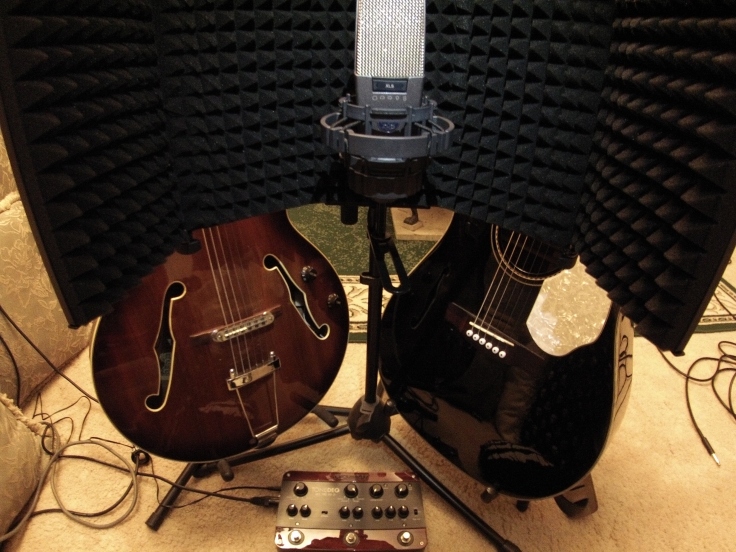
Guitar Rec 1
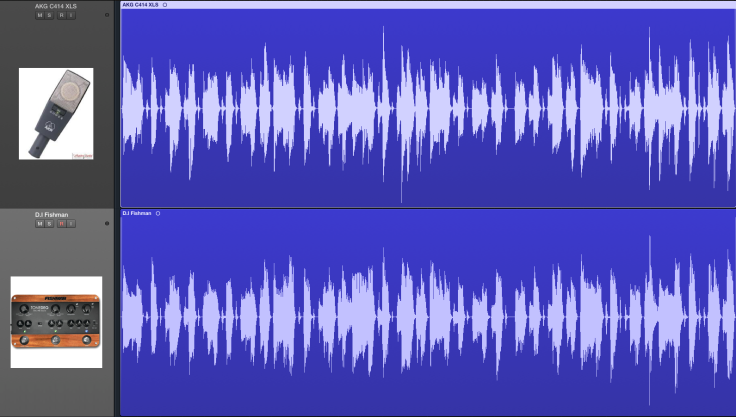
In the pic above I have my AKG C414 XLS (40Hz slope, 0dB pad, between wide & cardioid selected) set up in a noise reduction shell to input 1, then a Fishman Toned EQ D.I to input 2 & upon hitting record, playing guitar for a few strums then listening back to the take I can honestly say it has all the elements I need for my sample/track & all the things I don’t want too e.g my sisters dog in the background. Mind you this is all done in my mums living room haha.
This set up gives the live elements from input 1 the mic & the processed feed from the D.I in input 2 to shine through.
My findings with the AKG mic I hear pick strike, finger slides, body hits & play dynamic.
Through the Direct Input with compression pot @ 9 o’clock & both volume & EQ @ 12 o’clock it has captured good bass, sustain in the notes, full body in the audio throughout all frequencies relevant & you guessed it…no dog in the background.
Both inputs seemed to have complimented each other in capturing things the other couldn’t or even by their nature missed. From here we can EQ, pan & mix inputs to a desired sound.
Guitar Rec 2
Of course there are settings on my guitar & on the D.I which I could tweak but for now I am happy with what I got.
Take a look at the difference in the recordings. Top is the Mic & below D.I.
Above is final bounce of mixed inputs with EQ, compression, bus sends & limiting on the master.
The AKG take is dry, no EQ added. Can you hear the dogs collar jingle when she scratches?
You can hear the difference with this D.I take, its clean with no EQ added.
My findings are quite satisfactory, I would be pleased to use this style of recording in my productions. Although better recording environment, better equipment & a better player could all help…but this is all me & my gear so the only way is up…in quality not volume.
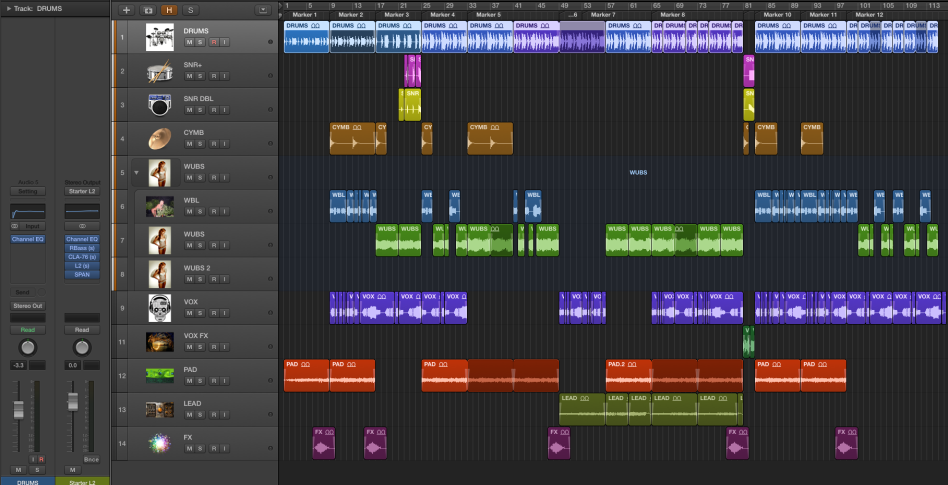
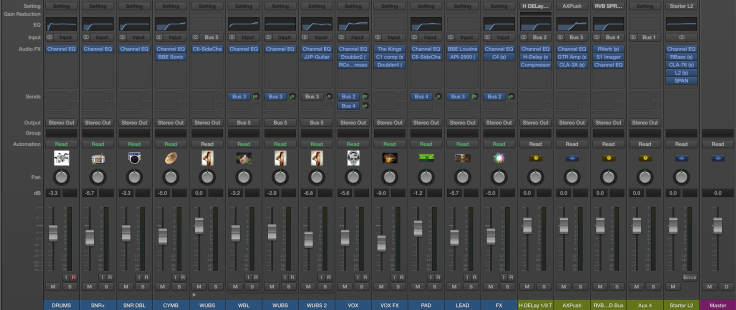
Using a construction kit I inherited from someone. I tetris…ed this track to mix down in different ways.
Mix #1: Audio directly from the DAW (Logic X) channel strips into the stereo output which had a simple EQ, boost, compression, limit chain type set up over the master.
Each track had its own plug-in chain, certain tracks had bus sends.
Drum track is bounced together so no individual parts for that to mix & group.
No huge automation just side chaining certain sections to allow the kick to punch through ha.
In all I enjoy the track & mix completed, having the drums in one track gave me less to fiddle with but being able to separately refine each sound has its obvious benefits.
Next I shall experiment with assigning tracks to separate bus channels before sending to stereo out.


 I decided to invest in this plywood X2.
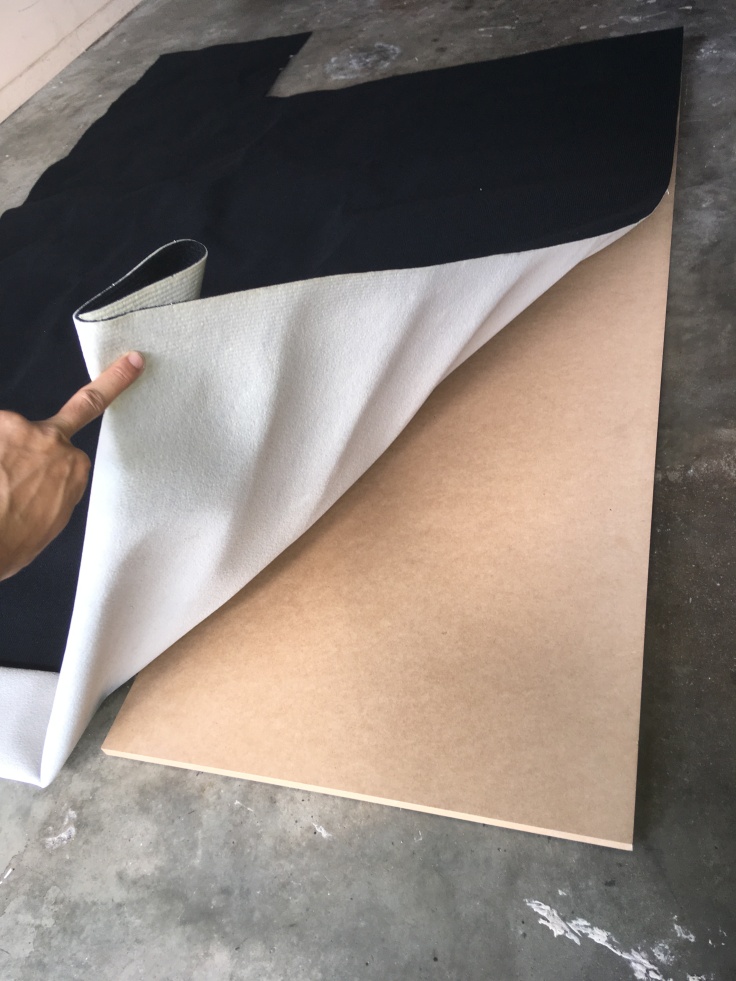

 Leaving some space at the bottom I set to designing the stands.
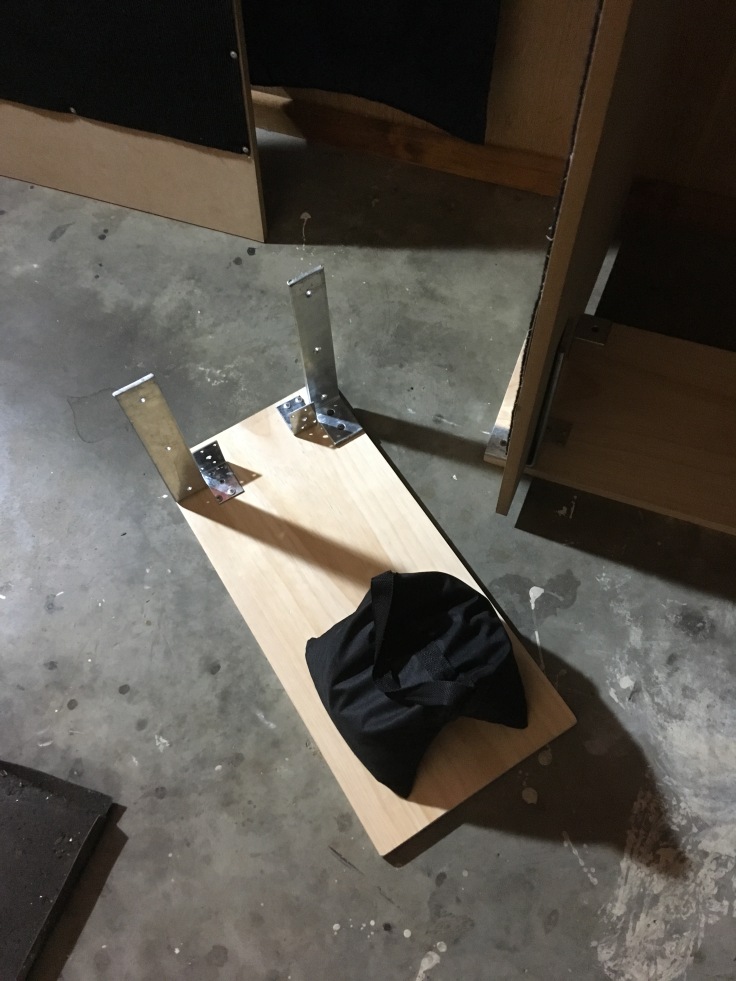
 Happy with the result, just a bit of sanding & dressing up they will be good to G.O.
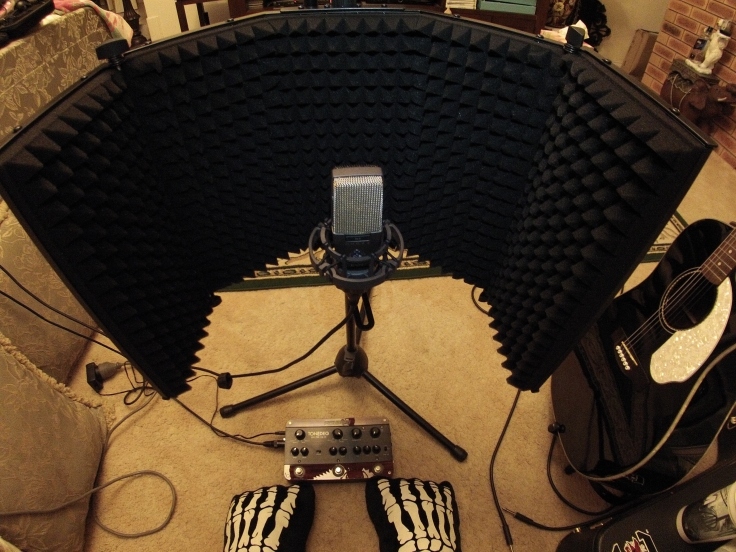

Recent Comments